Self Tanner for Beginners: Everything You Need to Know

If you've never used self-tanner before, that beauty aisle is genuinely confusing. Mousses, sprays, drops, creams, gradual formulas, express formulas, shades from "light bronze" to "ultra dark." And hovering somewhere over all of it: the fear of walking out looking orange.
I get it. My first self-tan, about eight years ago, was a disaster. I grabbed a mousse off a drugstore shelf, applied it with my bare hands onto completely unprepped dry skin, and walked into a work meeting the next morning with streaky shins and palms that looked like I'd been handling Cheetos. Not a great first impression.
But self tanner for beginners doesn't have to go that way. After testing more than 100 formulas over those eight years, I know exactly what trips up first-timers, and I know exactly what fixes it. Here's the guide I wish I'd had before that meeting.
How Self-Tanner Actually Works
The active ingredient in almost every self-tanner is DHA, short for dihydroxyacetone. It's a simple sugar that reacts with amino acids in the outermost layer of your skin and turns them brown. Not the same process as a real tan. No melanin involved, no UV exposure required.
That color develops over four to eight hours. What you see right after you apply isn't the final result. Most formulas include a guide color (a temporary cosmetic tint that shows you where you've covered), but that rinses off in the shower. The actual tan keeps building.
It fades as your skin cells turn over, which takes about five to seven days. You'll see it fade first at elbows and ankles since the skin there exfoliates faster. If your first application isn't perfect, it'll be mostly gone within a week. That's genuinely good news for beginners.
One more thing: DHA doesn't interact with UV light at all. A self-tan gives you zero sun protection. You still need SPF if you're going outside.
The Best Self-Tanner Formula for Beginners
This is the most important decision you'll make, and most beginners get it wrong. The wrong format means even flawless technique won't save you.
Why Cream Beats Mousse for First-Timers
Mousse is the most widely available self-tanner format. It dries fast, which sounds like a benefit until you're mid-application trying to blend your way around a knee cap and the product has already set.
That fast dry time is fine for experienced users who move quickly and know exactly what they're doing. For a first time self tanner experience, it's punishing. One hesitation and you've got a tide mark.
Cream formula is different. It stays workable while you apply, it blends without rushing, and if you accidentally double over an area, the consistency forgives you. Cream is the pick for anyone how to start self tanning for the first time. Full stop.
Spray tanners are even harder than mousse. The mist pattern is uneven, you can't reach your own back, and over-spray is hard to control indoors. Drops need to be mixed into a moisturizer at the right ratio, which takes practice. Save those formats for later.
Start With a Gradual Formula, Not a Dark One
Products labeled "ultra dark" or "express" are made for people who already know how their skin reacts to DHA. They deliver significant color in one coat, which is great when you want that. When you don't know what you're getting into, it's a lot to commit to.
A gradual or medium formula lets you build slowly. One light coat, let it develop, see where you land. Then decide if you want more. You can always layer more product the next day. You can't undo eight hours of development.
Clean Ingredients Make a Real Difference
Most drugstore self-tanners are loaded with synthetic fragrance, alcohol, and parabens. The fragrance is the bigger problem. DHA already has a smell during development (that biscuity scent is just the chemical reaction happening) and synthetic fragrance layered on top creates something genuinely unpleasant.
Alcohol-heavy formulas also dry your skin over time. Dry skin exfoliates faster, which means your tan fades faster and looks patchier toward the end of its life cycle. A clean formula holds color longer and fades more evenly.
If you want to understand exactly what to look for on a label, our self-tanner ingredients guide breaks it down without requiring a chemistry degree.
And if you're wondering whether the DHA itself is something to be concerned about, the complete sunless tanning guide covers the science and safety record in full.
Prep: The Step Most Beginners Skip
I tell every beginner the same thing: prep is 40% of the result. The formula gets the other 60. Technique is almost secondary.
Exfoliate 24 to 48 Hours Before, Not the Day Of
This is the most common beginner mistake. Exfoliating on the same day you plan to apply self-tanner opens your pores, and DHA can pool in them and create tiny dark dots across the skin. Not a great look.
Exfoliate the day before. A gentle body scrub works. Dry brushing works too. Focus on elbows, knees, and ankles, which are the areas with the most built-up skin cells and the most likely to go uneven on you.
Shave the night before too, for the same reason. Shaving right before you tan causes skin irritation that affects how DHA develops.
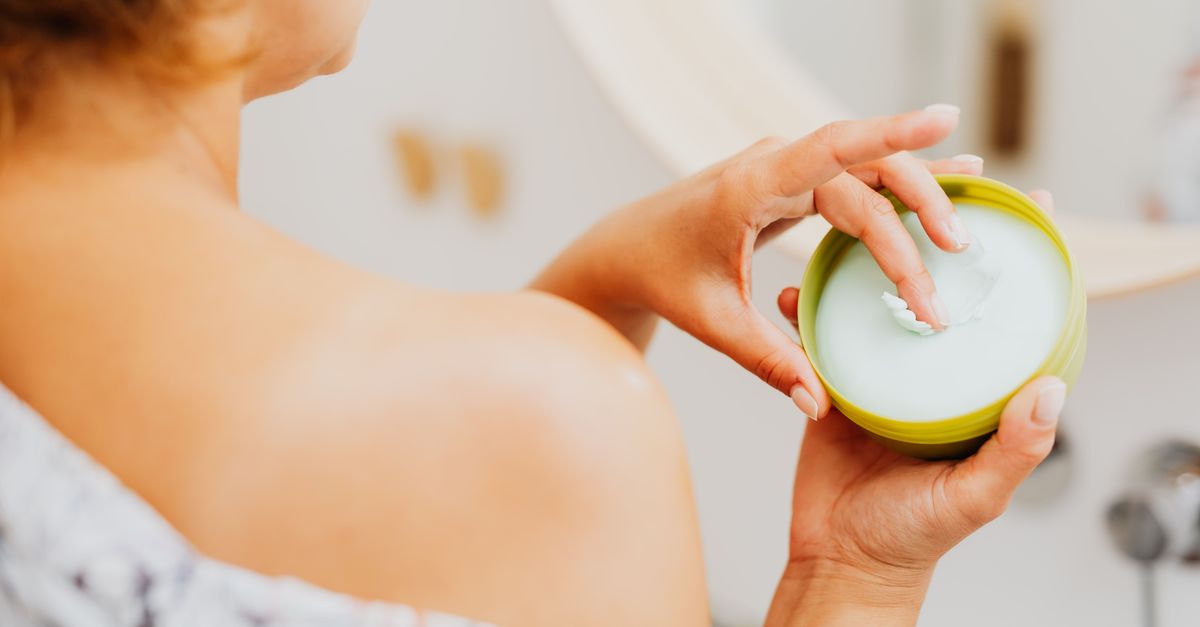
Moisturize the Dry Spots, Not Your Whole Body
About 15 minutes before you apply, put a light layer of body lotion on your elbows, knees, ankles, and the tops of your feet. These areas have drier, rougher skin that absorbs more product than they should. A thin barrier of lotion slows that absorption and helps them come out the same shade as everywhere else.
Don't moisturize everywhere. Too much lotion on the skin blocks absorption and the tan won't come in at all.
Get a Tanning Mitt
A decent tanning mitt costs about $10 to $15. It's the single best purchase a beginner can make before they start.
Applying with bare hands puts DHA directly into your palm creases, between your fingers, and under your nails. Those spots go dark. A mitt keeps the product off your palms and distributes it much more evenly across the skin surface. You get fewer streaks and a more consistent result with almost no extra effort.
How to Apply Self-Tanner: The Beginner Approach
Start at your feet and ankles, then work upward. This sounds backward, but it means you're not crouching over a freshly-tanned lower leg and accidentally smearing it.
Work one section at a time: one leg, then the other. Use circular motions to work the product in, then blend with long strokes down the limb. Don't use more product than you think you need. You can layer more tomorrow.
At the knees and ankles, press lightly. Use the residue on the mitt rather than a fresh press of product. Same for the tops of your feet. Those spots already have lotion on them, so they'll absorb more slowly anyway, but you don't need to pile more product on.
For your hands, apply only to the back of each hand and blend toward the wrist. Palms get nothing. Wash your hands thoroughly immediately after applying, up to your elbows, even with a mitt.
Then don't shower for eight hours. Wear loose, dark clothing. Skip the workout. Let it develop. For a more detailed walkthrough of every step, our complete self-tanner application guide covers it from start to finish.
The Formula That Makes All of This Easier
Here's what I've found after years of testing: the difference between a great first experience and a frustrating one almost always comes down to formula choice. The criteria aren't complicated.
You want a cream texture that stays workable. A gradual formula that builds color slowly. Clean ingredients without synthetic fragrance. Something forgiving enough to be applied by someone who doesn't yet know all their own rhythms.
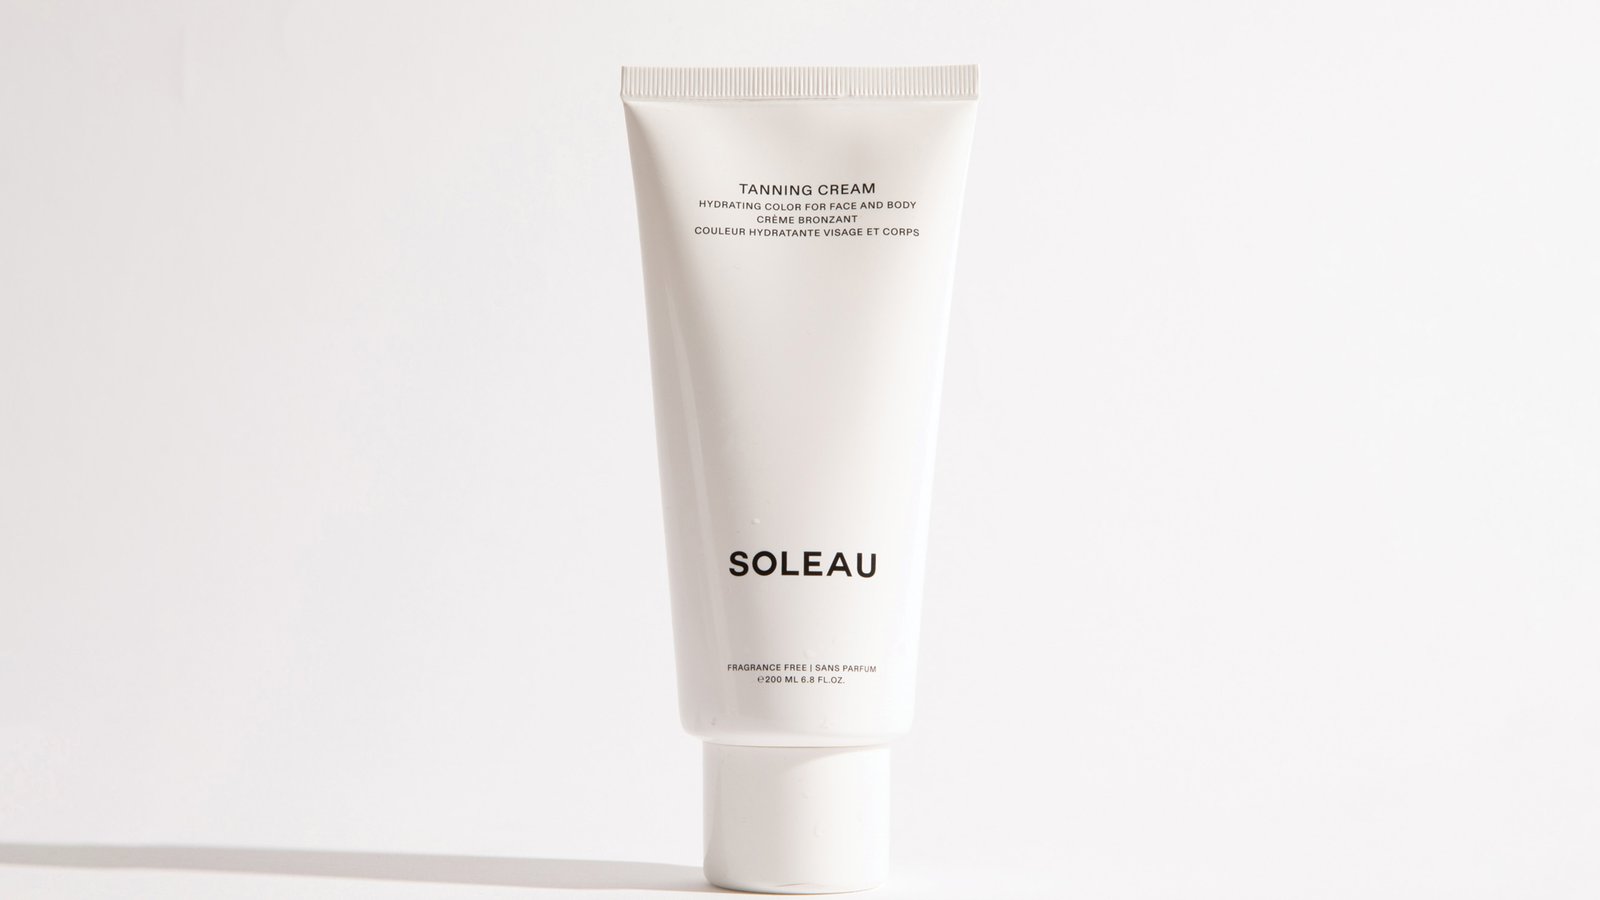
This is exactly why I keep pointing beginners toward Soleau Tanning Cream. It checks every box on that list.
The cream consistency blends without rushing, the build is gradual enough that your first application won't overshoot, and the formula is fragrance-free so the development smell stays minimal. It goes on like a lotion, which means the application feels familiar even for someone doing this for the first time.
Rhiannon R., who bought it based on a Google search, put it this way: "I did what you shouldn't do and googled 'best self tanners' and this actually came up highly recommended. BEST blind purchase I've made! No streaking, ZERO scent, no blotching. It's perfect."
What to Expect From Your First Application
Your first self-tan probably won't be perfect. Mine wasn't. But "not perfect" is a long way from "orange disaster," and even a first-timer using a good formula with proper prep will come out with something that looks genuinely good.
Expect the color to come in over eight hours. Go to bed after you apply. Wake up, check the color in natural light. It might be lighter than you expected, which is fine.
A second application in two or three days will deepen it. It might look exactly right. It will not look orange if you used a clean cream formula on prepped skin.
When it starts to fade around day five or six, your elbows and ankles will go first. That's normal. Exfoliate before your next application and the fade will be even.
The self-tanning guide for beginners comes down to this: pick the right formula, prep your skin, and give it time to develop. The technique gets easier every single time. Most people who try it properly once are surprised by how much they like the result.
For a broader look at what's available across every format, our full ranking of the best self tanners covers everything from drugstore picks to cleaner formulas, sorted by skin type and result. And if you want to see how Soleau specifically performs against other popular options, the best natural self-tanner comparison is a good read.
Ready to skip the salon entirely? Our ranking of the best at-home self tanners covers the formulas that actually replace a spray tan appointment.
Try Soleau Tanning Cream →Frequently Asked Questions About Self-Tanning for Beginners
How long does self-tanner take to develop?
Most self-tanners take four to eight hours to fully develop. The guide color (if your formula has one) rinses off in the shower, but the actual color keeps building overnight. Wait at least eight hours before showering for the best result.
Do I need to exfoliate before using self-tanner?
Yes, and timing matters. Exfoliate 24 to 48 hours before applying, not the same day. Exfoliating right before opens pores and causes uneven color development. A gentle scrub or dry brush works. Focus on elbows, knees, and ankles where skin texture is roughest.
Why does self-tanner smell?
The smell comes from DHA reacting with amino acids in your skin. It's often described as biscuity. It's stronger in formulas that also contain synthetic fragrance, so choosing a clean, fragrance-free formula minimizes it considerably. The smell fades after you shower.
How often should beginners apply self-tanner?
Start with one application and let it develop fully before deciding if you want more color. Most people reapply every three to four days to maintain their glow rather than applying daily. Daily use can build up at dry spots like elbows and ankles.
What is the best self-tanner formula for beginners?
Cream formula is the best starting point. It blends more forgivingly than mousse (which dries fast and requires speed), and it doesn't need the same precision as drops or spray. A clean, gradual cream gives you the most room for error on your first application.